Window Blockout
You will be notified when the item is restocked. You can manage your subscriptions from your account.

Size Guide
Window Blockout
Please measure your windows to determine how many rolls you will need prior to purchasing. We do not accept returns on opened rolls.
| ergoPouch size | 2 roll pack | 3 roll pack |
|---|---|---|
| Size per roll (cm) | 46cm W x 183cm L | 46cm W x 183cm L |
| Size per roll (inch) | 18.1" W x 72.1" L | 18.1" W x 72.1" L |
Best For

Children
Single or double-glazed windows in any room of the house. (Not suitable for frosted, non-smooth surfaces).
Description
The reusable static-cling Window Blockout is the perfect solution for babies and toddlers who need total darkness in their room to sleep and dream the night away. A completely dark room during sleep will help stimulate melatonin production (that magical hormone that helps regulate sleep/awake cycles ), be comforting for your baby, and help prevent early waking or late settling during summer and daylight saving.
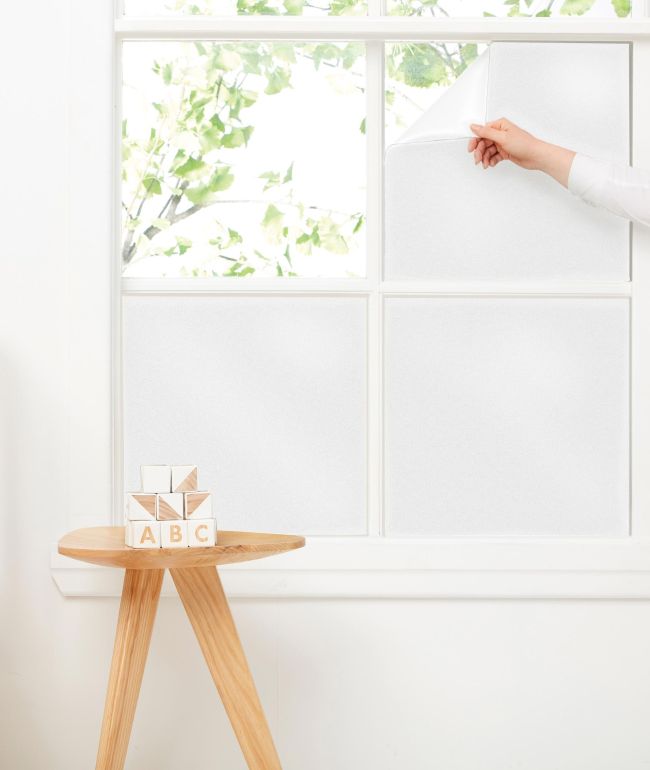
The Window Blockout is made from 3 layers of material with a completely opaque inner layer to block 100% of sunlight from rooms. The outer layers are white to seamlessly and stylishly blend in with your child’s sleep space. The inward-facing side of the blind will block out the light, and the outward-facing side will reflect light away from your windows, helping to regulate the room’s temperature for a more comfortable sleep.
The Window Blockout is a static-cling blind meaning it adheres with static and not adhesive. No sticky residue will be left on your windows, and the blind can be used again and again without losing its stickiness! Being reusable means you can remove the Window Blockout during 'awake' times to let the sunlight in, and simply reapply at nap time to block the light out. Simply roll or fold for storage when not in use.
The Window Blockout comes in a roll, simply measure your windows, cut to size and apply to the panes of your windows. Windows can be opened and closed as usual. The Window Blockout is best suited for single of double-glazed glass windows in any room of the house. It is not suitable for frosted windows, windows with a non-smooth surface or privacy glass or plastic.
Please measure your windows before purchasing to know how many rolls you will need.
Features
-

-

-

-

-

-

-

How To Use
Tips & Tricks
- Prior to purchasing, please check your windows are suitable. Our blinds will not work on windows with tint, glaze or texture. If you have uneven windows, please be mindful you may not get the 'perfect' application and a few extra strips to patch up slithers of light may be necessary. Depending on window size, blinds may require 2 people to successfully apply. It may take a couple of attempts to apply in the correct position, you've got this! Ensure the window is clean before application. We recommend wiping with water, to remove any dirt, grime, residue or mould. After cleaning, wipe your windows down with Windex or a cleaning product, ensuring no streaks or product residue is left behind. If your windows are in direct sunlight, humid conditions or warm conditions like under a heating vent, allow for shrinkage. We recommend allowing an extra +0.5cm all way around the frame, before you cut. Note these conditions may also contribute to higher risk of blinds falling off. Apply blinds from top window down. Just like applying applying wallpaper, wall decals or contact to books, take your time. Slowly apply the blind to the window, ensuring to smooth out the air bubbles as you go, while peeling the underside off. It's best to use a credit card, window squeegee or rolled up towel for smoothing to ensure a bubble-free finish. If a few small bubble remain, don't worry! The blinds will still stay adhered to the window. If there any large air bubbles or bunching on the inside of blinds, this can comprise the adhesion and increase risk of falling down. You'll need to take them down and reapply again from top-down, smoothing as you go. Very low temperatures also may affect application. Condensation on window and heaters may cause blinds to peel away from window.
Instructions
- Measure the width and length of your window.
- Add 2CM to each measurement and cut sheets to appropriate size. This will ensure you don't accidentally under-cut and end up with a gap.
- Using a spray bottle or a damp cloth, apply water to the window.
- Peel the blockout from the storage sheet.
- Gently apply the shiny side of the blockout to the window at the desired height, and smooth the rest of the sheet down with your hand or a credit card.
Air bubbles? Don’t stress, simply peel off and apply again.
How to Remove: Gently remove the sheet by peeling it towards you, away from the window. You can fold or roll for storage to be reused again and again. Ensure blind and window are both clean when reapplying.
Tip: For windows with direct sunlight for most of the day the Window Blockout needs to work a little harder to stick to the window. We recommend to cut the blockouts a few cms more than what is needed. These steps will ensure that light doesn't sneak through any gaps & the blockouts stay on the window. Additionally, apply more water to the window prior to placing the Window Blockout.
For a visual guide on how this all comes together check out our How to Use the Window Blockout Video
Materials & Care
Materials
PVC 0.24mm + 170GSM paper
Care
Wipe clean with a damp cloth or wet wipe. Debris stuck to the cling side will reduce effectiveness.
Size & Safety
Size
Warnings
Do not use directly above or within arms reach of a baby's bassinet, cot or bed.
